Cob Rendering
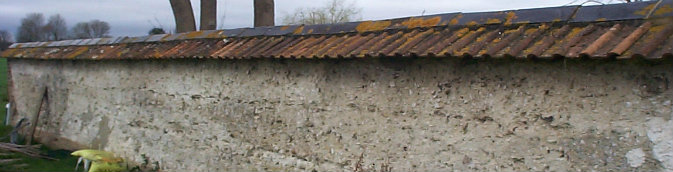
There are various types of walling material depending on the subsoil in your location. Cob is a term often used to describe the clay and straw mixes mainly found in West Country. In the Wessex region the traditional cob is made of chalk sometimes with or without the addition of straw. The chalk being the aggregate and binder in one. Chalk cob walls can range in colour from almost pure white to a muddy brown. The application process described below is for chalk cob but much is also applicable to clay cob.
Whichever type of cob you are dealing with there is an old saying that "Cob walls should always have a good hat and boots". Meaning that maintained roof/capping and where possible the plinth should be exposed and repaired re-pointed as necessary using suitable lime mortar. Or as the old saying goes the wall should have a good hat and boots to keep the moisture out.
A cob wall in good condition in a sheltered situation does not need render coats for protection. A render finish even lime can never look as good as cob.
Cob, chalk and earth walls are by nature of a soft friable composition.
Rendering and repairs should be carried out with lime putty mortar - MEDIUM STUFF or SECIL NHL2 mortar 2.5:1.
External lime coatings should be applied in relatively thin coats, therefore any defects in the form of hollows must be corrected before the application of the render coats by either rebuilding with cob material (normally available in the immediate area) or with cob blocks available from us.
Defects should not be corrected through coats of “dubbing out” (Thick applications of render/mortar). Areas of varying thickness are prone to shrinkage, carbonation and curing problems. Careful background preparation plays a vital part in the weather resistance capability of the wall.
Materials to be used in background repairs, should, wherever possible, be matched to the existing fabric. In doing so, the repair will be compatible and produce a similar performance pattern. Where previous remedial work has taken place with unsuitable materials, (i.e. dense cement mortars or bricks), these should be removed if possible without causing more damage and repaired with matching lime mortars or chalk/chalk cob.
Cob Wall Preparation
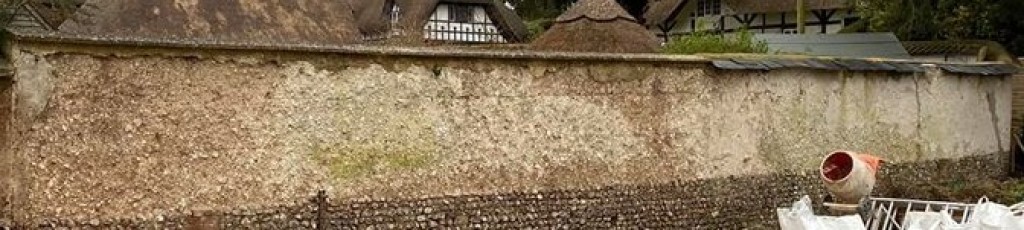
The background must be free from dirt, grease and vegetation. These elements should be removed before repairs are underway. The removal of biological growths should be thoroughly carried out, as any remaining lichen, algae, etc; will grow back and attack the bonding between lime finishes and the background. The removal of ivy and other vegatation should be done with great care as it can often be within the cob.
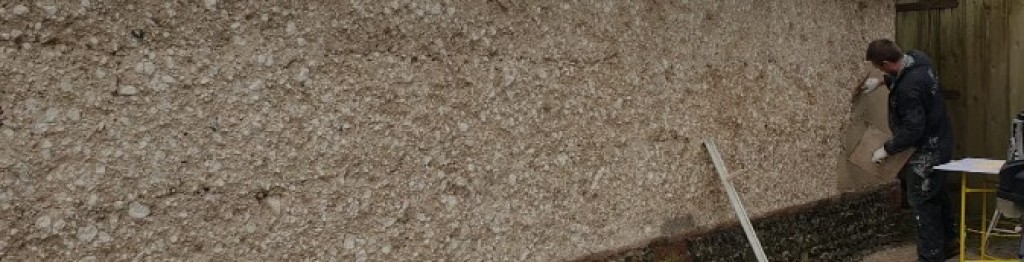
Cob and earth walls often have a friable surface which needs to be prepared before render or plaster can be applied. The wall surface should be dampened down on the day before application. A harling coat which is designed to stablise the friable cob is then applied to the wall by casting on from a HARLING TROWEL. The harling material is often a combination of weak hydraulic lime and aggregates mixed to a slurry consistencey. It can also be applied by mortar spray. It should then be left for at least 4 days to set hard before the application of the first scratch coat of render.
First Coat
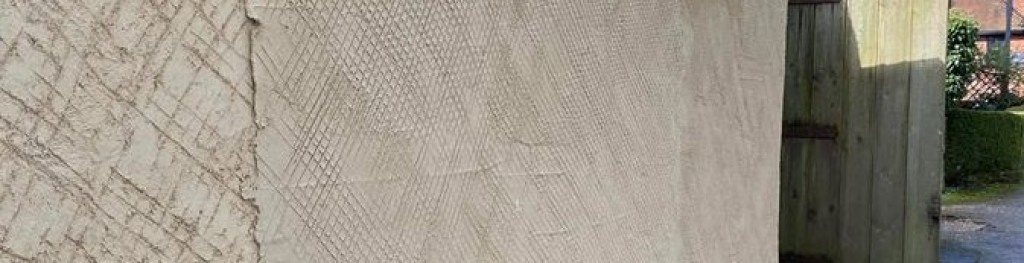
The first coat of lime render is applied by use of a laying on trowel or float, the coat is applied to a thickness of approximately 8-10mm thickness, coats much thicker than this will result in shrinkage cracks, in 2 coat work, this coat will need to be straightened by use of plastering straight edges, once flat the coating should be left to stiffen up, sometimes known as tightening, as this happens, the render should be compacted and compressed by scouring the render with a wood or polyurethane float, i.e., rubbing up in a circular motion. The over working of the surface should be avoided as this will draw lime to the surface. During the scouring process any shrinkage cracks should be closed, by pushing the crack back with the edge of the trowel and rubbing new material into the depression.
Once this process has been completed the surface is keyed by use of a scratcher in a diagonal pattern. The inclusion of hair or other fibres in the backing coat mixes will greatly aid the minimising of shrinkage cracks and is strongly recommended.
Second Coat
Before the application of the second coat, the first coat should be left for a minimum of 4 days, during which time the first coat should be checked for shrinkage cracks and also kept damp to avoid rapid drying out. Before applying the second coat the first coat should be damped down, making sure the water is absorbed into the render and not sitting on the surface. The second coat is applied using the same tools as the previous coat.
The coat thickness should be 8mm and no thicker, the coat is applied left to stiffen and then scoured up to the required finish, as before over scouring should be avoided. Good curing once the work has been completed is essential if shrinkage cracks are to be minimised.
After the application of lime renders, controlled curing and protection will be needed to ensure maximum strength and durability are achieved. The lime putty will stiffen initially due to absorption of moisture into the wall and evaporation to the air and will cure and harden as a result of Carbonation’, (the re-absorption of carbon dioxide).
The NHL 2 will set more quickly as a result of a chemical reaction with the clay content known as the ‘hydraulic set’. ‘Carbonation’, (the re-absorption of carbon dioxide), also takes place. This process is best achieved in warm and moist conditions, which allows the new works to dry slowly. Therefore, during and after completion of the work, it is essential to ensure ambient conditions.
Rapid drying by the sun, wind or artificial heat will all have a detrimental effect on the final outcome of the lime finishes. Temperatures below 5ºc will slow the carbonation and hydraulic setting process and frost conditions will damage un-carbonated areas, through the action of freeze-thaw (expansion/contraction) resulting in feeble and crumbly finishes.
Excessive shrinkage is a result of rapid drying, and this can lead to separation between coats and background and cracking. Rapid drying of the surface of new mortars, can also lead to the pores of the mortar becoming blocked with fine material, transported to the surface by the passage of water evaporation too quickly from the mix, this will inhibit the carbonation process taking place deeper into the new mortar.
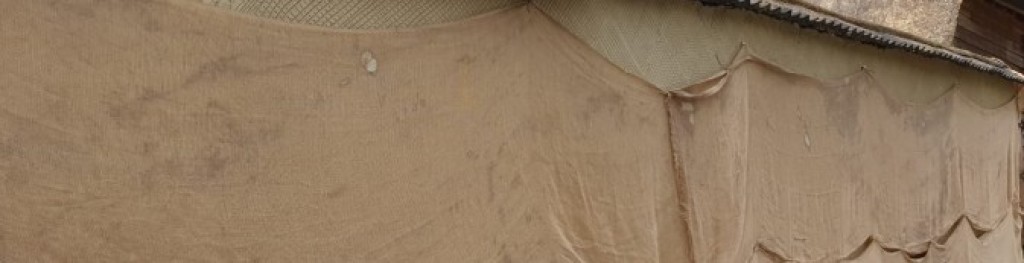
The best way to control and protect the carbonation process is to form a microclimate for the new work. Where the new work is scaffold, this can be a reasonably simple job. Scaffold netting is very useful for reducing the effects of wind. In addition to this in warm or hot conditions, damp hessian can be placed against the new work and then covered by sheeting to stop rapid drying. New work should be damped down for a minimum period of 10 days after completion and longer if possible. The emphasis should be on damping down as opposed to saturating new work. Provision should be made for damping down over weekends, holidays etc. In cold weather, the work must be protected from frost attack, by using thermal blankets e.g. polystyrene sheets. Hydraulic plasters/mortars will stand up to cold conditions after 3-4 weeks of hardening. It should be remembered that prolonged periods of cold temperature will slow the overall hardening process and extended periods of protection will be called for.
Any cracking occurring after the first few days of application can be remedied by scouring the surface with the wood float around the area of cracking to fill and compact the crack.
Health and Safety
Harling by its nature of application carries a risk factor, and therefore personnel should wear protective equipment, particular attention to be given to EYE AND SKIN PROTECTION. Eye wash should always be on hand. Gloves should be worn when working with any mortars or plasters


